Sourdough Pizza

I’m really into sourdough.  I love greeting my levain, or starter, in the morning when it’s all active and bubbly after a night of quiet fermentation; I love the sweet honey/wine smell of proving dough in the kitchen; I love the satisfaction of lifting fresh, hot, baked delights from the oven after a day of nurturing them from levain to loaf.

image
good morning, levain

Sourdough makes great bread, but the same starter can be used to create other doughs, like delicious tangy, chewy pizza bases.  A previous post gives the recipe for our buckwheat and pumpkin pizza base, which is quick and delicious and gluten-free, but if you’re after something with a more traditional texture and are willing to invest a little time (and culture!) into your dough, then give this a go!

For a pizza base big enough for two or three, take:

  • 1 heaped tablespoon of active* sourdough starter (see this recipe to make your own)
  • 150 mL warm filtered water
  • 1. 5 cups flour + more for kneading (I use freshly ground wholewheat, but spelt, rye etc., or a combination of several flours, will do)
  • 1 teaspoon good quality salt (I like unbleached Australian seasalt)
  • 1 tablespoon olive oil

Preparation: 15 minutes

Proving/waiting: 6 – 9 hours

Cooking: 30 minutes

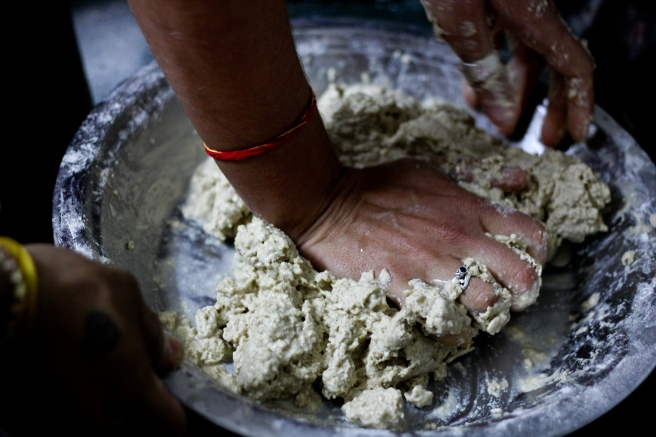
  1. In a ceramic or glass bowl add a large spoonful of active sourdough starter to warm water.  The levain should float a little in the water until stirred through.  Slowly add 1.5 cups of flour, stirring until combined.  Cover the bowl with a damp cloth and leave for about an hour.
  2. After an hour, sprinkle dough with flour and knead into a ball with the seam at the bottom.  Cover again with a damp cloth.  If you are home during the day, go onto step 3, but if you aren’t you can skip the kneading and go straight to step 4.

    JosieFraser_pizza_1705-1
    knead dough into a ball and cover
  3. This part is optional, but the more times this step is repeated, the lighter and chewier the dough will become!  Approximately each hour, for four to six hours, sprinkle flour over the dough and knead briefly.  Reshape into a ball, with the seam at the bottom, and cover with a damp cloth.
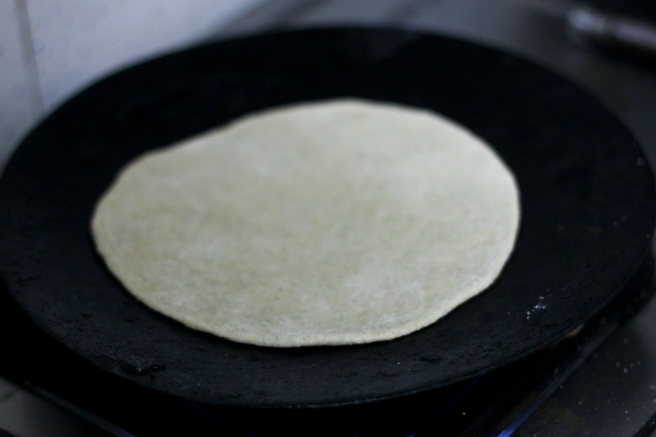
  4. After 4 to 6 hours of the first proof, the dough should be soft and pliant.  Add salt and olive oil, and knead again to combine these.  On a floured surface, roll dough flat to a thickness of about 3 – 5 mm, into the shape desired (i.e. the shape of your baking tray!).  Place on an oiled, floured tray and cover again with a damp cloth.  Leave for two to three hours to prove again.
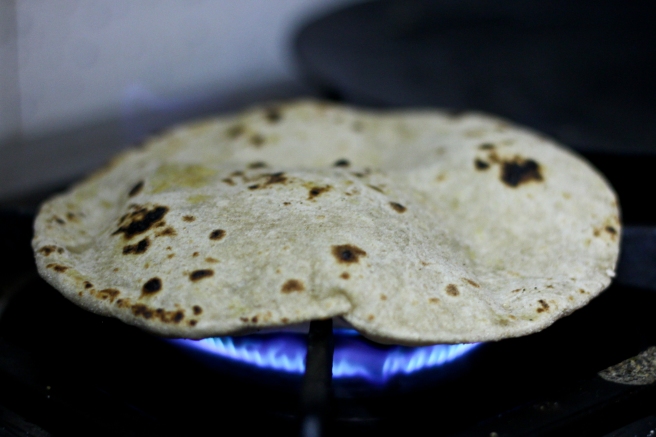
  5. After a few hours, the pizza base should have softened and risen a little.  Turn the oven on very hot, and bake the pizza base for about 5 minutes.  Remove, brush with a little more olive oil to stop the crust going soggy, and cover with delicious toppings (my favourite flavours tend to involve loads of chilli, garlic, and lemon…).  Return pizza to the hot oven and bake until your toppings are done and the base is brown and crispy around the edges.
  6. Enjoy fresh and hot, eaten with your fingers and shared with friends!
JosieFraser_pizza_1705-7
Perfect crust!

* Activating your sourdough starter:  Remove your starter from the fridge the night before you want to use it.  Activate by feeding it a little fresh flour and water (simply stir equal parts of both into the starter with a wooden spoon), and leaving the jar covered with a cloth overnight.  You should wake to find a cheesy/winey smelling starter that has grown in size and is nice and bubbly.  It’s now ready to use.

Berry Ice-cream

Ice-cream for dinner?  Why would you want anything else?

Summertime in Tasmania is full of berries and right now all the blackberries (a terrible noxious weed, but delicious all the same) by the roadsides are ripe and heavy.  The huge shared veggie garden at my workplace has been providing us with buckets and buckets full of raspberries, strawberries, blueberries, boysonberries, and black and red currants.  All of the vitamin C, antioxidants and other miracle nutrients for which berries are so famous.

img_20170219_212457_484
black currants

The other day as I was leaving I quickly filled my lunchbox with black currants and brought them home for this delicious ice-cream.  This is a recipe we discovered a few years ago when visiting a friend’s parents’ farm up on the east coast of Tasmania.  They are a family of inspiringly generous foodies and gardeners, and visits always leave us full-bellied and grateful.

Ingredients

  • 1 cup cream (pure cream; check the ingredients list so you don’t get something full of gelatine and other weird additives)
  • 2 cups frozen berries (black currants here but any will do)
  • 1 – 2 tablespoons raw honey

Put it all in the blender and blend until smooth.  The frozen berries will chill the cream so you end up with instant ice-cream with a divine, soft-serve kind of texture.  Add more or less honey depending on taste (black currants are super tangy and need a bit more, whereas blueberries are quite sweet already).  I’d say don’t blend it toooo long…you don’t want to end up with berry butter.

That’s it.  Share it; eat it all at once; don’t worry about dinner.


img_20170219_212413_371
black currant ice-cream

Apricot Summer Pie (gluten free)

We’ve been a bit absent here at Possum Kitchen for the past few months.  We ended our time of travelling together and have gone separate ways, diving into separate projects.  Neither of us has had a kitchen for a while and these new projects have been a wee bit consuming.  But I have a kitchen being built for me while I type, and we can’t stay away from our foodie dreams for that long so here is a little tale for the summertime.

In beginning my own grand new project I’ve found myself living in the whole new world (for me) of temperate Australia; Tasmania, to be specific.  As a child of the tropics and sub tropics temperate climates provide an exotic wonderland of new foods in abundance, most notably, in the summertime, stone fruit.  Peaches, plums, apricots, cherries.  Driving home from the surf the other day I stopped beside the road and bought an enormous box of slightly overripe apricots from a lovely old fella because I am a sucker for seasonal fruit and damn it was a bargain!


img_20161229_182438410
early season apricots

I’ve been eating apricots fresh with yoghurt and muesli, freezing them and making them into smoothies but the box doesn’t seem to be getting lighter.  The dear man building my kitchen is a self-professed glutard (with coeliac disease, so it’s the real deal) with a healthy sweet tooth so I made gluten-free pie crust, filled it with apricots and put it in the oven.  I’ve never seen him so content.  Gluten free short crust pastry is super easy and baked apricots make the most delicious, rich, tangy, sweet mess you can imagine.

Ingredients:

1/2 cup fine brown rice flour

1/2 cup buckwheat flour

3/4 cup almond meal

1/4 cup coconut flour

1/4 cup sugar (rapadura, raw…whatever you have)

125 g cold butter cut into 1 cm cubes **

1 large egg ** (I used a duck egg because I have a very happy caramel duck who hides caches of eggs in the jungle of the chook pen; a chook egg will do fine)

fresh apricots, around 1 kg

If you have a food processor process all the dry ingredients so they are well mixed, then add butter and pulse until the mixture is crumbly like bread crumbs.  Add egg and pulse until it is just mixed through.  If, like me, you don’t have a food processor you can do it all with your hands.  Mix your dry ingredients together and then add the butter.  Using your fingers rub the butter into your flours until it is crumbly.  Add the egg and keep mixing until the egg is somewhat evenly mixed through.

Now this is the bit where I get lazy.  Proper pastry people will chill their pastry for half an hour in the fridge, then roll it carefully, chill again and arrange the rolled sheet in the pie dish before baking it.  You are welcome to do this but I’ve always found pastry is delicious done my way.  I do chill it for a little bit once it’s all mixed together, 10 – 15 min in the fridge.  During that time I preheat the oven to 180°C and grease a pie dish (I don’t actually own a pie dish, so instead I grease a 20-something cm diameter spring form pan; pie making doesn’t need to be an exact art.)  Instead of rolling my pastry I put into all into the ‘pie dish’ and squash it out with my fingers until it is of even thickness across the base and a few cm up the edges.  Perhaps if I had a rolling pin I would roll it but this way is super easy and fun, and always seems to make beautiful pastry.  Bake this for 10 minutes or until it’s golden at the edges.

img_20161229_184334612
pastry crust ready for baking

The filling is nothing but apricots.  Cut them in half and remove the stones, then layer them into the pastry shell until it’s full.  Bake the pie for 30-40 min until the apricots are soft and the top layer has started to darken a little.

Serve hot with cream or icecream.  And then cold for breakfast if you don’t eat it all at once.

img_20161230_115200030

** If you want a vegan pie replace the butter with cold coconut oil and the egg with a tablespoon of chia seeds soaked in 1/4 cup of water and then blended until it resembles beaten egg.

Chapattis

Indian meals, particularly in the north, tend to be accompanied by a wheat-based flat bread that is eaten with the hands and used to scoop up any number of delicious dahl and vegetable dishes.  A while ago we wrote a recipe for paranthas, a (typically) stuffed flat bread found all over the Indian subcontinent and Sri Lanka.  Chapattis are another variation on the theme and are common across northern India.  They are a dry, light, soft bread, cooked simply without oil or spice and best eaten immediately.  To make 10 – 12 chapattis take:

  • 500 g wholemeal wheat flour (barley, rye or spelt flour if you prefer)
  • pinch of seasalt
  • 300 mL filtered water

Note: you really need a gas stove for cooking chapattis, the open flame is key.

Josie Fraser_Naveem's_Mar2016-37
use your hands wherever possible

Much like paranthas, mix flour and salt together in a large bowl, using your hands. Add water a little at a time, scattering it over the flour with your hand rather than pouring it straight into the middle, this gives a more even distribution, making kneading easier. Knead dough with both hands, as you add more water it will become quite wet and sticky but if you dip your hands in water they shouldn’t stick too much.

Josie Fraser_Naveem's_Mar2016-38
dough should become quite sticky

Set aside a small bowl of dry flour for dusting and dust your work bench and rolling pin with some of this flour. Place a heavy pan over a low flame to heat. Using floury hands take an egg sized piece of dough, dip it in flour and gently roll it out until about 2 – 3 mm thick.

Turn up the flame under your pan and place the rolled dough on the dry pan.

Josie Fraser_Naveem's_Mar2016-50
place dough on a hot, dry pan

Cook 1 – 2 minutes until the top side slightly changes colour and becomes dry. Flip and cook on the other side and cook a few seconds.

Then remove the pan and, using tongs, place the chapatti directly over the flame and cook for a couple of seconds each side, keep flipping as the chapatti bubbles up and becomes crisp.

Remove from heat before it burns. Done!Josie Fraser_Naveem's_Mar2016-56


The Few Foods We Loved in Cuba

We’ve just arrived back in the world of telecommunications from a month wandering about Cuba with Mama Possum. Cuba for us was bright colours, hot sun, the sound of horses’ hooves on paved roads, constant music, green mountains, blue seas, very fast Cubaño Spanish, and fruit growing everywhere. Cuba is a magnificent country, particularly if one can escape the tourist bubble and slip out into the “real world” a little. We also found it a challenging country, not in the least for its cuisine.


JosieFraser_Baracoa_Aug-24
green mountains and blue seas

As our previous post on resourcefulness suggests, we found the affordable food in Cuba not quite to Possum tastes. Cuban food is largely greasy, meaty, and sugary.  There are, however, a few things that we really love about Cuban food, and we will tell them to you here.


JosieFraser_SierraDelRosaria_1608-3
a few of our favourite Cuban foods

Our favourite culinary thing about Cuba is its fruit. Historically, Cuba has long been known for its abundance of delicious fruits, and it didn’t disappoint.

MumsPKPhotos-7
buying mangos

Being in the tropics with large areas of fertile soil, Cuba grows a huge variety of delicious fruits that can be bought for a few pesos in any municipal mercado, from small piles in people’s front doorways, or from roaming vendors that ply the streets with push carts calling out in that instantly recognisable global street seller’s nasal voice “Haaayyyy… Aguacate! Aguacate! Guayaba! Guayaba!”. Probably about 90% of our diet in Cuba was fruit, as this was by far the most readily available wholesome food. In the north and west of the island, mangos were in season while we were there, and were by far the best and biggest we’ve eaten anywhere in the tropical world (and we’ve eaten a lot of mangos in a lot of tropical places). In the south, avocados and guavas were the fruit in greatest abundance; in the far east it was perfect bananas in every shade of yellow, green and red. In amongst these abundant staples were all sorts of other fruits, from coconuts and carambolas to soursop and mamey sapote, and we simply ate as many as possible.

JosieFraser_Baracoa_Aug-28
Mama Possum in coconut heaven

Surprisingly, for home sourdough bakers, we also really enjoyed Cuban bread. The bread in Cuba is soft and white and not at all like a hearty sourdough, but is made with decent quality, unbleached flour and seems free from sugar and preservatives. Unlike most white bread we’ve eaten, Cuban bread didn’t make us almost instantly hungry from super fast metabolism of simple carbohydrates. Perhaps the flour is processed relatively simply, so the starches within it retain more of their natural complexity, thus taking longer to digest? Also, curiously, Cuban bread didn’t aggravate Mama Possum’s arthritis as much as wheat bread usually does. Bread in Cuba is baked in small panaderias (bakeries) throughout day, so is always super fresh. People collect their daily allowances of bread in big bags from the panaderia, or from bicycle panaderos that roll around the streets with stacks of fresh bread rolls in crates on the back of their bicycles. We would go to the panaderia in the early morning to buy a handful of warm rolls for breakfast. Sometimes, despite the shelves full of freshly baked bread, there would be none available to buy as there was no surplus beyond the allocated quantity for each regular customer with their state ration booklet. Fortunately there seems to be a panaderia every few streets or a panadero on a bicycle around every corner, so we were never short of bread on which to spoon huge amounts of avocado.

Cuban streets tend to smell of baking bread and roasting coffee. Cubans drink a lot of coffee. They drink it thick and sweet from tiny cups, seemingly all day. In the cities, people sell coffee through the front window of ground floor terrace apartments, and passers by gather around to buy a quick cafecito for a single peso. Cubans are justifiably proud of the quality of their coffee, and there is a delightful Cuban custom of welcoming any guest in one’s home with freshly brewed coffee. This was a challenge to our caffeine-sensitive systems, but Cubans are such generously hospitable people that we gradually built up a tolerance to caffeine as we so loved this custom (and the Cuban coffee).

JosieFraser_Holguín_Aug-6
“dos cafecitos, por favor”

Although most of our diet in Cuba consisted of fruit, complemented with fresh bread and avocado, we did manage to find a little Possum-friendly protein from time to time. The simple Cuban dish “congri” involves black beans and rice cooked together with a few spices. Wherever we could find a basic little family restaurant, with a menu priced in the local moneda nacional currency rather than the convertible peso “tourist currency”, we would buy congri. (A tip for thrifty travellers: restaurants and other establishments that price things in the convertible peso currency often have items priced the equivalent of 30 times the price of the same item in an establishment using the local Cubano currency, so get your hands on some moneda nacional if you’re travelling on the cheap and/or want to eat where the locals do). Congri usually costs a few pesos, fills the belly, and is satisfyingly tasty. Mama Possum and I were invited for lunch to the home of a wonderful lady called Jelena who cooked us congri and revealed its simple secrets.

First, cook the frijoles negros (black beans) in a pressure cooker; drain and rinse (read this recipe first, to get tips on how to best prepare beans for optimal digestion).

Second, fry onion, garlic and cumin in a little oil until the onion and garlic are nice and soft. If you like, you can add a few tomatoes and chillis here too, and experiment with your favourite spices.

Add the onion mix to the pot of beans with rice and more water. Cook together until the rice is done.

Congri is generally served with fried sweet yellow plantain, pieces of sweet potato, and slices of crisp cucumber. We love it with a huge piece of avocado as well, as avocado makes everything better.


JosieFraser_SanctiSpiritus_Aug-18
congri

Cuba: lessons in resourcefulness

Of our friends who have travelled to Cuba, every one told us in advance ‘prepare to be disappointed by the food’; it was sage advice. Typical Cuban food is heavy on cheese, oil, sugar, white wheat flour and meat, and low on vegetables and, um, flavour. Many people love it, and we have certainly loved some of it (anticipate a subsequent story of the elements we did love), but much of it is not really possum food. So we thought we’d take the opportunity to write a little tale on resourcefulness when it comes to finding nutrition and taste in places where these things aren’t immediately obvious. Written in Cuba, it is clearly through a tropical lens that we have presented these ideas, but the basic premises can be adapted for other climates and cultures.


JosieFraser_Havana_Aug-11
La Habana Vieja – Old Havana
IMG_0712
buying avos and mangos from the street sellers in Havana

One of the first things we do in a new town is seek out the local market. In most countries through which we travel every town seems to have a central market in which we can buy local, seasonal fruit and vegies, as well as other local produce like pulses, grains, nuts and meat. If no central market is apparent there will always be someone selling local produce, if you look around a little. Being super interested in food we are always fascinated to see what is growing in a particular climate, soil type and culture; the local market is also key to resourcefulness as a traveller. One big tip is to embrace local and seasonal produce. You can generally tell the most local and in-season produce because it will be the cheapest and most abundant. Try new things. If you don’t know what something is ask the person selling it – ask them how to prepare it; buy some, take it home and give it a go. It may be your new favourite thing or you may spit it straight back out but that’s all part of the adventure.


Cook for yourself where possible. One doesn’t always have access to a kitchen but it is handy to carry, at the very least, a small, sharp knife, a spoon, and plastic container with a good lid. This way you can take those delicious fruits and vegetables you bought in the market and turn them into a simple fresh salad. I must admit that I am travelling with a small pressure cooker as well, and this has proved endlessly beneficial as I am yet to visit a country where I cannot buy dried beans in a market and make myself a wholesome meal when I have access to fire, but for many people this may seem a little unncessary.


image
local produce = salad!  greens and cucumber from the organic community garden, fresh cheese, guava and avocado dressing


Another thing we always carry is a few small cloth bags for shopping. This means you can visit the market and buy all of the delicious things without having the personal environmental responsibility of plastic bags. Plastic bags also cost a bit for market vendors so most are grateful if you don’t take theirs away.


Sprout – sprout locally found pulses and/or carry seeds like alfalfa from home. This is another use for your container – use it as a sprouting jar and you can just pop it in your backpack during that long bus ride and you’ll have fresh vegies at the end. Sprouting is a really easy way to give yourself some good nutrition and fresh food in far-flung places; we’ve written a whole blog post about sprouting so have a look here for more details.


image
alfalfa sprouts

Rather than looking in local shops for processed, packaged snacks for long travel days, eat lots of fruit. Again, see what’s cheap and abundant in the market and eat heaps of it. Don’t buy apples in the tropics; they don’t grow here. In Cuba right now it is mango season and, for the record, I suspect they’re the best mangos in the entire world. We are buying nine or ten of these enormous treats for the equivalent of a dollar and mangos have become our every occasion snack. In Uganda it was bananas and avocados. In Tasmania in late summer it is apples.


JosieFraser_SanctiSpiritus_Aug-5

Get creative. Think about a balanced meal and replace known foods with local equivalents – for example if you normally eat bread, rice or pasta and these things are not to be found in any quality look at what local carbohydrate-rich foods are available in the market. You could use plantain, sweet potato, maize or cassava instead. If you don’t know how to prepare these foods ask the person selling them, ask the internet if you have access to it or ask us, we might know!


JosieFraser_Havana_Aug-21
black beans and tomato, boiled eggs, steamed plantain, avocado and sprouts

A final tip that is related less to resourcefulness and more to simply food and travelling… carry with you enough muesli for at least one breakfast when arriving in a new land. Often we arrive at some strange hour after days of long flights and waiting in airports. We wake up jetlagged and confused and really just need breakfast before anything else happens. Muesli and water is an excellent start and it makes good use of that plastic container and spoon. Then we can enter the world and figure out how to find the next meal. If you don’t eat muesli there will be something you can carry so that you don’t have to stumble into the morning in a new country with nothing in your belly. We tend to carry chocolate as well, but that goes without saying. Speaking of muesli and water, it’s really great travelling with a small water filter. Again, it saves the personal environmental responsibility of squillions of plastic bottles and you’ve always got drinking water. Ask us for water filter tips, if you’re not sure what to get.


These are some ways in which we approach the challenge of finding good food in different places while still embracing the culinary uniqueness a new land has to offer. Everyone has different ways of navigating this and we’d love to hear your ideas, so please leave us a comment!

JosieFraser_SanctiSpiritus_Aug-2
produce market with mama

Yucatán: chilli, lime and chocolate

The Yucatán Peninsula is in the far southeast of Mexico; a piece of the north American continent that is bordered by the Gulf of Mexico to the north and west, and the Caribbean to the east.  Yucatán is the heartland of the Mayans, and the distinct Yucatecan culture is strongly influenced by this.  Like the rest of Mexico, Yucatán is full of bright colours, intense sunshine, and super spicy chillis.

The food we have been eating in the Yucatán is some of the best we’ve eaten for months (have a look at our other travel food stories if you’re interested in what else we’ve been eating).  A lot of typical Yucatecan dishes are heavy, meaty and fried.  As we don’t like heavy, meaty, fried food, we haven’t eaten most of these things, but we’ve found some other deliciously fresh, wholesome foods that we want to tell you all about!  The flavours that typify our experience of Yucatecan food are maize, black beans, lime, avocado, chilli, tomato, queso fresco (a fresh semi-hard white cheese), and finely sliced sweet white onion.

JosieFraser_Mexico_July-20
maize tortilla, lime, onion and chilli

We always love street food, and there are some quintessential Yucatecan street foods.  One of these is the marquesita.  As the afternoon wanes, street corners and plazas are gradually occupied by little hand- or motorcycle0-driven food carts with colourfully striped roofs.

JosieFraser_Mexico_July-25
marquesita stand

Behind these stands, men (and they are almost all men, as far as we have seen) call out to passers by “marquesita, marquesita!”, and whip up delicious salty/sweet snacks throughout the evening.  A sweet waffle-like batter is cooked into a thin pancake, pressed in a double-sided pan.  Quickly, while it is still hot and soft, the pancake is filled with a selection of ingredients and rolled into a cylinder that quickly turns wafery and crispy as it cools.  Marquesita vendors have an assortment of fillings, from cream cheese to chocolate spread, but they generally say (and we agree) that the best filling is simply grated hard salty cheese.  This produces a crunchy tube of sweet, salty deliciousness that makes a perfect treat while wandering the streets in search of tacos or salsa dancing.

JosieFraser_Mexico_July-55
elotes

Historically, maize has been a really important grain in Mexico, and is still a staple for much of the country.  There are countless cultivars of maize, but most are hard, starchy varieties rather than the soft sweet corn we generally eat at home.  Maize is ground into flour for tortillas, steamed in banana leaves to make tamales and humitas, or cooked whole on the cob.  Street food stands sell elotes – boiled maize, on or off the cob, served hot.  Most people eat this with a decadent combination of sour cream, mayonnaise, cheese and chilli, but we prefer the simplicity of just chilli, lime and salt.

While not exclusively Yucatecan, we’ve really been getting into tacos.  Tacos are fresh and wholesome and delicious.  They involve soft maize tortillas, spoonfuls of black beans (or meat, but we’ve been sticking to vegetarian), piles of crisp, fresh raw vegetables, avocado, a little queso fresco, and an assortment of tasty salsas made from different chillis combined with tomato, tomatillo, and/or other mystery ingredients.  We’ve eaten tacos for breakfast in hot, bustling restaurants; we’ve eaten tacos for lunch on paper plates from tiny street corner taco stands; we’ve eaten tacos amid the hubbub of the evening salsa crowd.  We just really like tacos!

image
street corner taco love
image
ceviche mixto with mama possum

Everywhere we’ve travelled in coastal Latin America we’ve found ceviche.  Ceviche is a dish based on raw fish and lime, and each region seems to have a different variation on this theme.  Yucatecan ceviche is almost like a salad, with tiny pieces of lime juice-marinaded seafood combined with finely chopped tomato, fresh coriander, and sweet white onion.  It is served with bowls of crunchy fried maize tortilla chips, and an assortment of condiments, like extra onion, coriander, lime, and as many different chillis as you can imagine.  Our ethics don’t normally permit eating seafood from unknown sources as one can never tell the sustainability of a mystery fishery, but very occasionally our curiosity for culinary adventure outweighs these ethics and we simply must try something!  Yucatecan ceviche, eaten in the comedor of a crowded market, was well worth the ethical angst.

JosieFraser_Mexico_July-65
taza chocolate

It’s a well known fact that possums love chocolate.  You simply have to look at the number of chocolate-based posts on our recipes page, or spend half a day in our company, to understand how essential this food to our existence.  Coincidentally, the Mayans also love chocolate!  Some historians say Mayan society once used cacao as a currency for trade, and it was an integral part of their diet and culture from birth.  During our days in the Yucatán area, we consumed a lot of chocolate, primarily in liquid form.  In the market one can buy hard disks, or tazas, of drinking chocolate that are often sweetened with granulated sugar and sometimes spiced.  These are traditionally finely grated, melted into a cup of hot water, and whisked until smooth.

We’ll leave the Yucatán in a few days with pockets full of chocolate and the taste of chilli burning on our lips!

image
chocolita

Tastes of Kenya

A couple of months ago we wrote about our culinary explorations through lush wet season Uganda. Since then, we been wandering about Kenya, from the mountains, the plains, the desert, to the coast.  Kenya holds a little piece of both our hearts, and we will miss its huge skies and wide spaces, and the open smiles of its people.Josie Fraser_Kenya_July2016-71

Our Kenyan wanderings involved a lot of public buses and a lot of long distance driving.  Kenyan roads are notoriously poor, and travelling anywhere by road takes a long time!  Along the roads, at most points where an extra large pothole or an unexpected speed bump cause the traffic to slow even more than usual, people gather, offering bottles of water, fruit, and snacks for hungry travellers to buy.  As the staple carbohydrate of the country, maize is everywhere, and hot, freshly fire-grilled cobs are held out in handfuls to passing traffic.  These fill the belly, give the jaw a good work out, and are a tasty meal, particularly spiced with a bit of chilli.  At strategic distances along the road from maize vendors, troops of baboons tend to congregate to feast on discarded corn cobs.  Sugary sweets aren’t much of a thing, except in the more Arab-influenced coastal towns, but fresh fruit and machete-chopped chunks of peeled sugar cane satisfy a sweet tooth.  Our favourite roadside snack involves a hot hardboiled egg, peeled skilfully with a spoon (a trick I’m yet to master), cut almost in half, sprinkled with salt, and filled with kachumbari – a delicious mix of fresh tomato, red onion, and hot green chilli.

Josie Fraser_Kenya_July2016-39
breaking fast with a dhow captain

We were lucky enough to be in Kenya during Ramadan.  After four months travelling in largely Muslim countries, we’ve fallen in love with the gentleness and generosity of Islamic culture, and Ramadan was a delightful way to finish this journey.  Among other things, Ramadan involves fasting for 30 days, from dawn to dusk.  At dusk, people gather together to break their fast, sharing dates or pieces of fresh fruit and tiny cups of Arabic coffee with whoever is nearby.  I spent a few days in an old Swahili town on a tiny sand island called Lamu off the north coast of Kenya where the population is mostly Muslim.  Each evening I was whisked off to the nearest gathering of people to eat dates on a street corner or oranges on the deck of a wooden dhow.  After the flurry of breaking fast, the streets quickly clear as people head home to share iftar, the evening meal, with their families.

Josie Fraser_Kenya_July2016-44
families heading home for iftar

As we’re always interested in fermented and cultured foods, we were overjoyed to discover maziwa lala, a unique Kenyan ferment.  Lala, or mala, is similar to yoghurt, except it cultures milk at a comfortable room temperature of 25°C, rather than the 38°C required for conventional yoghurt (check out this post if you want to make your own yoghurt).  This means that there are lower energy requirements for its production than for yoghurt, as incubation isn’t necessary, and the fermentation process allows fresh milk to last for up to four days without refrigeration.  This is great for communities without much access to electricity.  Lala just tastes like a tangy, liquid yoghurt.  During our travels we bought lala in small bags beside the road, and made our own by adding a tablespoon to a jar of fresh milk and leaving it somewhere undisturbed for a day.

Josie Fraser_Kenya_July2016-1
homemade maziwa lala

Previous British colonisation of Kenya means that there is a lovely community of British descendants scattered throughout the country.  Within this community, one of the nicest traditions we experienced was that of sundowners.  Sundowners are quite literally quiet drinks shared with friends and family as the sun goes down.  Sundowners are generally enjoyed outside, watching the day close over the wide savanna, and allow everyone to come together and share stories of the day finished.  As there is no real twilight in the tropics, one must be relatively punctual to sundowner gatherings, and we often found ourselves wandering homewards in the starry darkness, trying to avoid being stepped on by elephants.

Josie Fraser_Kenya_May2016-54
sundowners

Aloo (Potato) Paranthas

Paranthas are a wheat-based flat bread found all over the Indian subcontinent and Sri Lanka.  They are often plain but can be even more delicious when stuffed with potato, onion and spices.  Paranthas are traditionally served hot off the pan with pickles, spicy sauces and yoghurt or as a side to dhal or a breakfast chana masala.  As they travel well, paranthas also make a great addition to an adventure food kit, functioning as tasty wraps for your salad or as a filling snack along the trail or river.

To make 10-12 paranthas take:

  • 500 g wholemeal wheat flour
  • ½ tsp sea salt
  • 400 mL water
  • 4 whole boiled or baked potatoes
  • 1 red onion, finely chopped
  • 1 garlic clove, finely chopped
  • 1 tsp ginger, finely chopped
  • ½ tsp green chilli, finely chopped
  • pinch of salt
  • ½ tsp garam masala
  • 1 tsp ground coriander
Josie Fraser_Naveem's_Mar2016-37
use your hands wherever possible
  1.  Mix flour and salt together in a large bowl, using your hands. Add water a little at a time, scattering it over the flour with your hand rather than pouring it straight into the middle.  This gives a more even distribution, making kneading easier. Knead dough with both hands; as you add more water it will become quite wet and sticky but if you dip your hands in water as you go, they shouldn’t stick too much.

2. To make the aloo filling grate the boiled potatoes into another bowl then add onion and all other ingredients. Stir through gently with your hands, being careful not to squeeze the potato too much – we don’t want mashed potato.

Josie Fraser_Naveem's_Mar2016-47
mix aloo filling gently with your hands

3.  Place a heavy-based frying pan over a low flame to heat. Set aside a small bowl of dry flour for dusting. Dust your work bench and a rolling pin with a little flour. With floury hands take a piece of dough about the size of an egg.

Josie Fraser_Naveem's_Mar2016-61
take a piece of dough

4.  Gently roll it into a disk roughly the size of your hand.

Josie Fraser_Naveem's_Mar2016-62
roll into a disk

5.  Hold the disk in one hand a fill with a big tablespoon of potato mixture.

6.  Pinch the disk closed over the potato, being careful not to squash the potato mixture out as you do; you want to seal the potato inside.

7.  Drop in flour again and gently roll flat until your parantha is about 3-5mm thick. Some of the onion will break the surface, this is fine.

8.  Turn the heat up under your pan and place your parantha on the dry pan.

Josie Fraser_Naveem's_Mar2016-60
place parantha on hot, dry pan

9.  After 1-2 minutes flip the parantha and drizzle a tiny bit of oil (mustard if you have it, or any other oil you like) around the edges then rub the oil over the whole surface.

Josie Fraser_Naveem's_Mar2016-77
drizzle oil around the edges

10.  Straight away flip the parantha again and oil the other side in a similar way. Press the parantha against the hot pan, particularly around the edges.

11.  Keep flipping and pressing until it’s nicely brown all over.

Josie Fraser_Naveem's_Mar2016-66
keep flipping and pressing
Josie Fraser_Naveem's_Mar2016-76
fresh aloo paranthas

Some variations:

If you want a buttery filling, spread a thin layer of butter or ghee on your dough after the first gentle roll, before you fill it with potato. Be sure to leave the edges of the circle unbuttered so they stick together.

Paneer parantha is quite common as well – instead of potatoes use 150 g grated paneer but follow the instructions in the same way.

If you would like paranthas without oil, cook the rolled parantha on a hot, dry pan as usual. Flip once after 1-2 minutes and, instead of dizzling oil over, leave on the second side 1-2 minutes. Remove the pan and, using tongs, place your parantha directly over the flame for a few seconds each side until crispy. You can put butter on one side of your parantha or eat it like this with no oil.

Josie Fraser_Naveem's_Mar2016-65
parantha without oil


Just Banana Pie

In our travels, we often spend time in the homes of friends or friends of friends across the world. Staying in people’s homes generally gives a much richer experience of a new place than staying as an anonymous traveller in the nearest hostel, and it allows us to strengthen that global community of like-minded people. Travelling in this way also gives us the opportunity for reciprocity – to invite other people into our homes when they visit our part of the world.

Bofa Road house
salt-stained coastal Kenyan sharehouse

What better way to thank a host household than to cook delicious food for them to come home to? I was recently staying in a sharehouse full of wonderful folks on the coast of Kenya; a huge salt-stained place set amidst baobab and coconut trees right on the Indian Ocean. Equipped with nothing but a large bunch of overripe bananas, a tin of ghee, and the remains of a bag of flour I bought for a making sourdough pancakes on the road, I created the most simple, delicious pie out of just bananas: the Just Banana Pie.

Josie Fraser_Kenya_June2016-24

Crust:

1.5 cups flour (wheat, spelt, buckwheat, rice, or any combination you like)

2 Tbsp ghee or coconut oil

¼ cup water

Pinch of salt

1 Tbsp of sweetness, if you like… honey, rapadura sugar, coconut syrup

  1. In a bowl, use your fingers to rub ghee or coconut oil into the flour. If you’re using just rice flour, you may need to add a binding agent such as a mashed banana, an egg, or a vegan linseed “egg” as explained in this recipe, to prevent the crust becoming too crumbly.  Slowly add water, combining with your hands until it forms a cohesive dough that is relatively firm and not too sticky. You may need a little more or less water, depending on the flour you choose to use.
  2. Again using your hands, press dough evenly over the base and sides of an oiled pie dish.
  3. Blind bake crust in a moderate oven for 20 – 30 minutes, or until it begins to brown slightly.
Josie Fraser_Kenya_June2016-19
blind bake crust until it begins to brown

Filling:

7 – 10 bananas, the riper the better (my favourite are small Cavendish, but any variety of sweet banana will do)

Pinch of cinnamon

Pinch of nutmeg

1 Tbsp coconut oil

Josie Fraser_Kenya_June2016-20

  1. Slice bananas lengthwise, and layer into the pie crust. Use as many bananas as it takes to fill the pie, pressing the pieces in to reduce the empty space… you want your pie to be as full of banana as possible!
  2. Sprinkle with spices and drizzle coconut oil over the top.

    Josie Fraser_Kenya_June2016-23
    fill pie crust with sliced banana
  3. Bake pie in a moderate oven for 30 – 45 minutes, or until the crust is good and crunchy and the bananas have softened nicely and are beginning to brown.
  4. Slice into generous pieces, and serve warm with yoghurt or fresh cream. This pie is also great cold; in fact it’s so simple and wholesome you could eat it for breakfast the next day without even feeling indulgent!
Josie Fraser_Kenya_June2016-27
just banana pie for breakfast